Normally sewing is done by stitching fabrics together, one fabric to another. In the context sewing a quilt, it’s called conventional (or traditional) piecing.
But sometimes sewing is done by stitching fabrics to a foundation, usually paper. We call it foundation paper piecing, or FPP for short. It involves printing the pattern pieces onto paper, sewing fabric directly onto the paper, then peeling off the paper to reveal a design.
Why would we use a paper foundation instead of just sewing fabrics together? A couple of reasons:
To achieve an intricate design. Complex shapes, extreme angles, and detailed designs are made possible by FPP. No other method comes close. The paper is a temporary tool - it’s used to achieve a detailed design and then it’s torn off and discarded.
Accurate and precise piecing is simple. Precise seam alignment can be really important, depending on the project. For precision in FPP, absolute accuracy is required in basically just one step: sewing on lines on the paper. Compare that to conventional piecing, where absolute accuracy is required in many steps: cutting fabric sizes, sewing a perfect one-quarter inch, and pressing without warping the fabric.

So how do we foundation paper piece? Fabric is layered on the unprinted side of the paper and then sewn on the printed side of the paper in numeric order. Since the fabrics are sewn together on the paper's unprinted side, the finished piece is a mirrored image of the paper pattern piece. Sewing on lines on paper - simple!
So let’s make a block. We’re going to use a fairly simple design that teaches you the basics of FPP. You can do this!
Supplies
Having the right supplies really makes all the difference in paper piecing. For the life of me, I just couldn't wrap my brain around the concept of foundation paper piecing until I started using a light box, the Add-A-Quarter ruler, and a postcard. These tools were key to making the process enjoyable.

Note: some of the links below are affiliate links, which means that if you buy, we’ll earn a commission at no additional cost to you. Please know that we have experience with these products, and we recommend them because they are helpful, not because of the small commission we'd make if you decide to purchase. Thanks!
- FPP pattern. We’re using the Awareness Ribbon by Sewfinity.
- Printer. To print the pattern pieces.
- Printer paper. We use inexpensive regular printer paper since it’s widely available. You could also use lightweight/transparent paper.
- Paper scissors and fabric scissors.
- Matte finish tape. Yes, MATTE. If you use shiny tape, it’ll melt when you use the iron.
- Light box. FPP requires visualizing fabric placement on the underside of paper. Since you can’t see through regular printer paper, a light box is handy. If not using a light box, a white work surface or window may also help. If using lightweight/transparent paper instead of regular printer paper, a light source is not really necessary.
- Sewing machine. With the standard all-purpose foot.
- Extension table and knee bar presser-foot lift for your sewing machine. Optional, but life-changing. The large flat surface of an extension table makes sewing easier and more accurate. It supports the paper and fabric layers so that there's a minimal (or no) amount hanging off the edge. This is especially convenient when holding paper/fabric layers in place with your hands, rather than using pins. The knee bar presser-foot lift is uber-helpful, requiring one less hand to operate the presser foot, so you can use both hands to hold the fabric layers in place before sewing.
- Auto thread cutter for your sewing machine. Optional, but it skyrockets your productivity. FPP involves lots of short seams and starts/stops, which can be a little tedious. But if your sewing machine has an auto thread cutter, it’s a huge time-saver.
- Sewing machine needle. Size 80/12 Microtex/Sharp or 80/12 Topstitch needles work just fine.
- Rotary cutter and cutting mat. We like to use the back side of the mat since the light solid color is not distracting, and we don’t need the mat’s gridlines for FPP.
- Clear cutting rulers. A 24.5“ long ruler for cutting yardage, a 12.5“ or 6.5” square ruler for cutting fabric pieces and trimming completed blocks, and a 1.5” x 12.5” ruler for trimming sections to size during FPP.
- Add-A-Quarter ruler by CM Designs. A must-have specialty ruler just for FPP.
- Iron. A small, lightweight iron is easy on the arm, since it’s used over and over and over during FPP. Plus, don’t use steam during FPP - paper and tape don’t like it.
- Ironing board. A full-size board placed perpendicular to your sewing machine table and lowered to the same height. This keeps everything in close reach.
- Postcard. Or index card, magazine subscription card, or similar-sized card stock.
- Seam ripper. For the inevitable sewing mistake, which is normal and okay during FPP.
- Tweezers. Optional, but helpful for removing tiny bits of paper.
- Sewing pins. For aligning multiple sections.
- Fabric clips. For keeping multiple sections aligned before sewing.
- Cotton fabric. Quilting cotton is widely available in tons of colors. Get yours at Sewfinity.com!
- Thread. Choose a color that won’t contrast with the majority of your fabric, in case it shows up on the front. 50 weight cotton thread is good for most projects. For extremely intricate or large-scale FPP designs, 60 weight polyester thread is stronger and less bulky.
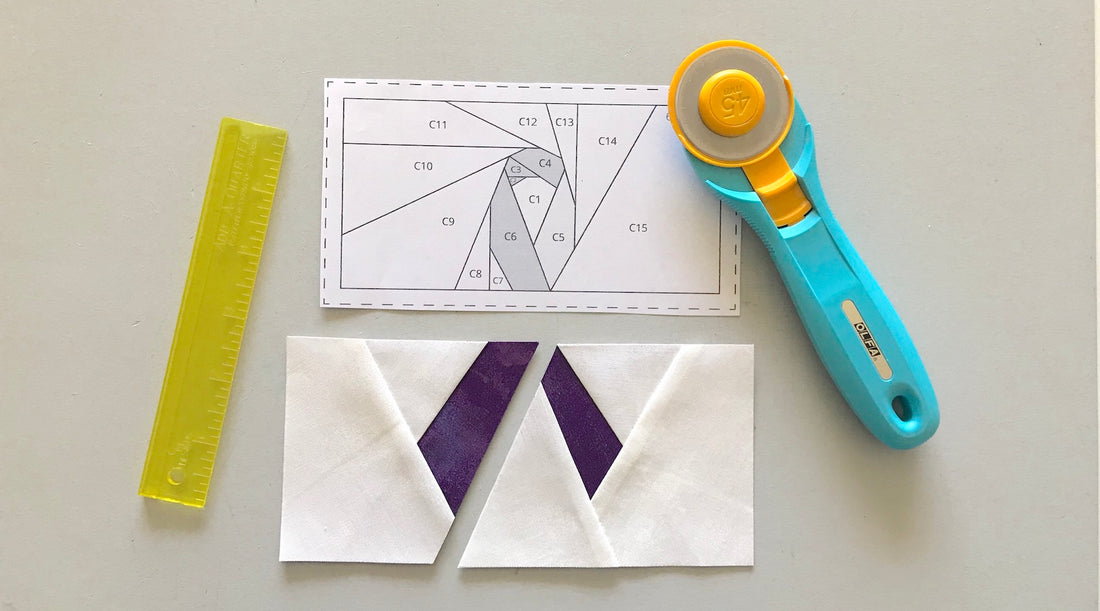
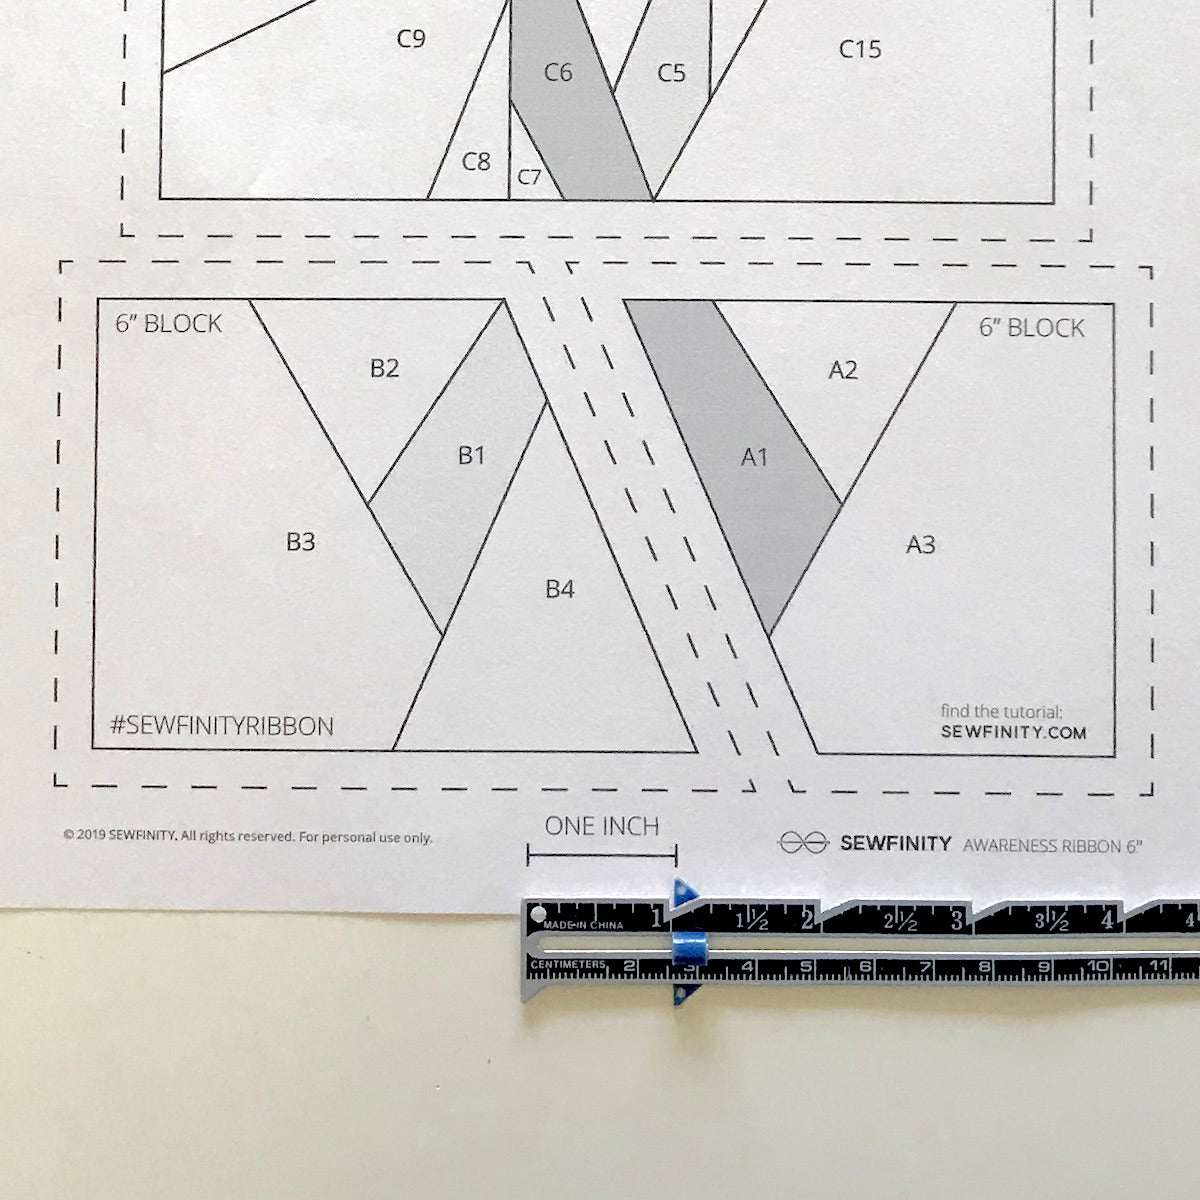
The FPP Pattern
The FPP block consists of sections of shapes, filled with numbers, used by you to cover with fabric. The numbers are the sewing order, the solid lines are lines you sew on, and the outer dashed lines are the lines you trim on.

Instructions
Set up for Sewing
1. Print the pattern
2. Cut out the pattern
Cut out the pattern pieces with paper scissors, about 1/8” outside the outer edges. No need to be precise at this point, since we'll be trimming the finished block size at the end. If applicable, tape large pattern pieces together with matte finish tape. If making many sets of blocks, keep them organized together with a paper clip.

3. Cut the fabric pieces
Cut out fabric pieces (if indicated in the pattern instructions) or start with over-sized fabric pieces that will be trimmed down as you go.

4. Needle and stitch length
Insert size 80/12 Microtex/Sharp sewing machine needle and set the stitch length to 1.3 - 1.7mm (15-20 stitches per inch). I set mine at 1.5mm, which is about 17 stitches per inch. A small stitch length make lots of stitches and notches in the paper, making it easier to remove the paper at the end and forming strong seams that won't pull out with the paper.
Make the FPP Units
The next 4 steps represent a process that’s done over and over and over again. To keep the step order clear in my mind, I think: L S T P. Layer, Sew, Trim, Press. To help me remember L S T P, I envision an imaginary letter I received, signed from a grunge band.
Love, Stone Temple Pilots... Yeah, I was young in Seattle in the 90’s. Okay then. Here we go!
1. Layer
- Paper pattern piece wrong side up.
- Fabric 1 right side up so that it covers area 1, and extends at least 1/4” beyond the edges of area 1.
- Fabric 2 wrong side up so that its edge is 1/4“ beyond the line between areas 1 & 2 on the paper. The fabrics are right sides together. Adjust placement along this line so fabric 2 will cover area 2 after sewn, folded over, and pressed in place. Note: to help visualize this (and to set your mind at ease), pretend that you just sewed on the line by holding the line ends in place, and fold it over to ensure it will in fact cover area 2. Look good? Now flatten out fabric 2 again.

2. Sew
Hold the layers securely in place and flip over, with the paper side up. Sew directly on the paper, on the line between areas 1 & 2, with a few more stitches at the beginning and end. This extends the stitches past each end of the line, giving reinforcement. If the line has an endpoint at the outside edge of the section, extend the stitches further, right off the edge of the paper.
If the section is quite large and it’s difficult to hold the layers securely in place before sewing, place a pin or two through all layers to keep them in place temporarily.

Verify your stitching placement by opening up fabric 2, ensuring it covers the area 2 and extends 1/4” past its edges.

Did you make a sewing mistake? Don't worry, it's easily fixed. Just remove the stitches with a seam ripper and cover the notches on the printed side of the paper with some matte finish tape. The tape serves as a new surface to sew a new seam, and it won't melt while pressing later on, like other tapes would.
3. Trim
Place the section paper-side-up on the cutting mat, with the latest-sewn number on top.

Place the postcard along the just-stitched line.

Fold the paper down over the edge of the postcard. This exposes the excess fabric that we want to tidy up.

You won't see this yet, since you're sewing the first seam, but in later seams, you might find that as you trim excess fabric, stitches from previous seams may prevent a complete fold. That's normal and okay. Just gently pull the paper away from the fabric to reveal the entire stitching line, and fold along that line.
Place the ruler on top of the postcard, so that its lip fits snugly against the postcard.

Trim the excess fabric with a rotary cutter, leaving a 1/4” seam allowance. Cut the fabric, not the paper.
For miniature blocks or for areas with many tiny intersecting seams, consider trimming a 1/8” seam allowance, to reduce seam bulk.

4. Press

Open up fabric 2 piece, and fold it over right side up so that it completely covers area 2 and extends at least 1/4” past its edges. Press with a hot dry iron.

5. Repeat
Repeat LSTP Layer/Sew/Trim/Press (Love, Stone Temple Pilots) steps until all areas on the paper are covered.

6. Trim the section
Trim on the outer dashed line, using a rotary cutter and cutting ruler. You are trimming both the fabric and paper layers, leaving a 1/4” seam allowance. Note: if using a pattern that doesn’t have the outer seam allowance displayed, trim 1/4“ away from the outer solid line.

Section is complete! Now complete any other sections using this same process.


Assemble The FPP Block
1. Join multiple sections
If the pattern has multiple sections, join them together in the order indicated. Clip sections right sides together. To align points or intersections, insert a pin straight through the intersection, place fabric clip just above the pin in the seam allowance, and remove the pin.


Sew the sections together on on the solid line and backstitch at the beginning and end of each seam.

Press the seam open or to the side, depending on how the seams wants to naturally lay. Use the iron on the fabric side, not the paper side.


As you continue sewing sections together, you may be sewing over a previous section seam. When that happens, remove the paper from the underside of that seam before sewing over it, to prevent the paper from being hard-to-remove later on.


2. Remove the paper, trim, and press
Remove the paper from the back. It’s a lot like tearing out checks from your checkbook. Don’t be too forceful with this, so that you don’t rip out the stitches. But since the stitch length is really short, you might be surprised at how strong the stitches are. To make removal easier, remove in reverse order, starting with the last seam sewn. Using tweezers will help remove any tiny paper pieces.
Trim any loose threads. Also trim seam allowances that need tidying, grading seams as necessary to reduce bulk or to prevent dark fabrics from showing through to the front. Press the entire back and front of the FPP block.


There you have it! You now know how to foundation paper piece. Start with a simple pattern, get lots of practice, and soon you’ll be confident to make any foundation paper piecing project. The basic process is the same, no matter how complex the design. Have fun and enjoy feeling empowered to create a wealth of designs that are made possible by FPP.

3 comments
Thank you so much. I am in the process of making a quilt for a dear friend who is fighting breast cancer for the 2nd time and wanted to make a ribbon to attach to it in some way besides the fabric itself. Thank you, thank you, thank you. I will let you know how it turns out.
Thanks so much, Birdie, you strong woman!
Thank you so much for supporting breast cancer awareness! I am a survivor 7 years & counting!